Building My First PC
Ebay
Many of my components I acquired used (or unused) on Ebay. You'll learn a lot of things when you first start bidding on Ebay. You'll see a lot of acronyms like DOA (Dead On Arrival) and NIB (New In Box). You might notice that many, if not most, of the items for sale are actually new. One thing I noticed was that many parts were stripped out of new machines. It may be that retail prices are so high that you can make money by buying a computer, stripping out the parts, and selling each part separately. I also learned that sellers can remove your bids (although you can't). One of mine was removed because I had no feedback.
You will probably want to get a Paypal account as that is the easiest way to pay and many sellers require it. Make sure you do this early. It takes some time to verify your account. Paypal will make a couple of small deposits into your checking account, and you have to report how much those deposits were. Once this is done, buying becomes very easy.
Before buying anything, make sure to look at the shipping price. Sometimes a cheap item may have an unreasonable shipping cost. Always look at the seller's feedback rating. Do a few google searches to get some idea of how much the item costs. Make sure the item is what you want and that it is working. Some sellers are selling BROKEN items. Also, don't spend enormous amounts of time bidding on something that only costs 10 bucks. I did that a few times -- it's addictive. You might save a dollar or two, but it will cost you five hours. Even though you can get things cheap online, you will pay a lot for shipping. Most of what I bought was between 10 and 40 dollars. Shipping is usually anywhere from 5 to 15. Sometimes you can buy multiple things at once and save on shipping. But I found that usually what happens is, you buy something and wait a week. When it arrives, you then learn you need something else. So you buy that...
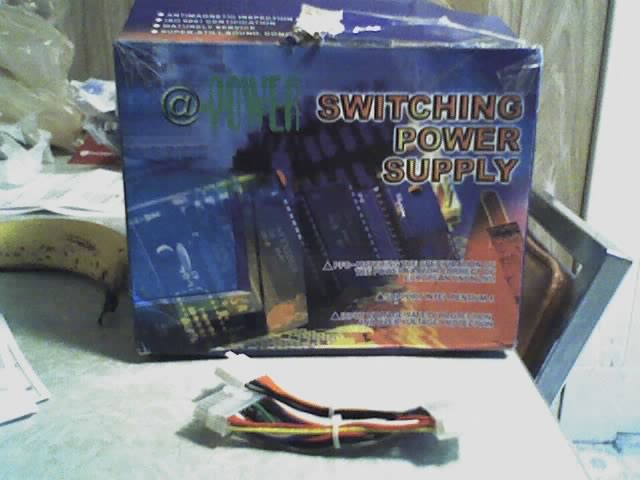
I have never seen so many packages in my life. The picture below is of a cable I bought and the box it came in. The next cable I got was smaller and the box was twice the size of this one. Half my floor was covered in boxes. Some of the packaging is overkill. I had a paperback book sent to me that was packaged in two layers of bubble wrap and had tape all over the outside of the package.
Hardware
This started out as a small project to replace my six year old laptop. (I've never built my own before.) But of course I wanted a few extras. Little did I realize how much work it was going to be. Back when I was an intern at the JHUAPL, I used a dual CPU machine on networked drives. The CPUs only ran at like 300 or 333 mhz -- state of the art at the time. But the machine just seemed to run so smoothly, and sometimes I wasn't even the only one on it. The hard disks were great too. I assume they were probably SCSI. I'm not sure if they were raid. But I decided I wanted a setup like that.
I started out looking for quad and dual CPU motherboards. Once I had read a posting by a guy who claimed he had thrown together a cheap 4-CPU board just to do protein folding. However, I was quite surprised to find that there were very few 4-CPU boards available and they cost 1000 to 2000 dollars. Even the 2-CPU boards were somewhat expensive. I eventually settled on an a7m266-d with two modded athlon XPs 2000+ for about $250 after shipping. I suspect that there are cheap dual/quad motherboards out there for non symmetric multiprocessing CPUs. Perhaps I was just searching for the wrong terms. For my needs, SMP isn't really necessary. Once I finally got everything setup, I noticed (in top) that only one CPU is shown even though there are two in /proc/cpuinfo. The machine mentioned above always showed the CPUs separately.
Once the board arrived, I learned that you have to apply thermal grease to the CPUs and heat sinks. (The board had been used, but the guy I bought it from removed the CPUs). So I did some research and bough Artic Silver 5 thermal grease and some special cleaning agents to remove the old grease. I also got some cheap lint free cloth from Walmart (from the auto section). This next part is not fun. After you apply the grease to the CPU and the heat sink, you have to lock the heat sink into place over the CPU. This requires a significant amount of force and it's a bit nerve wracking. Fortunately I ended up doing this several times without any damage to the CPUs or motherboard. Your equipment is not as sensitive as manufacturers would like you to believe. I've done some pretty bad things and so far nothing has been damaged.
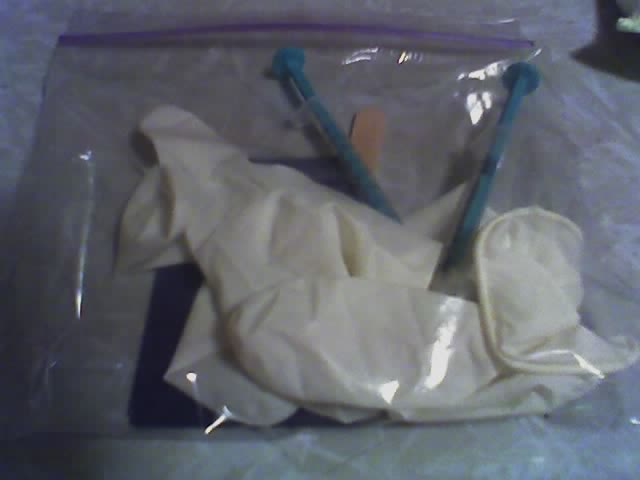
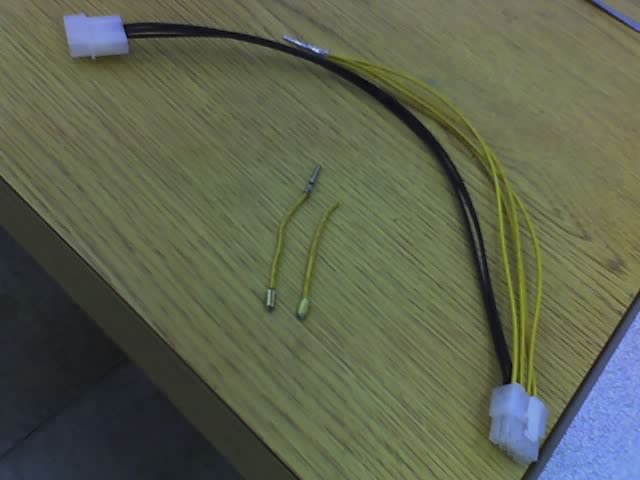
Once I had the CPUs and graphics card in place, I tried to turn on the board. It came up for a second or two and then shut itself off. After many attempts I did manage to get it to come on a few times. I read through the 2cpu forum and made a few posts. Eventually I found out that this motherboard has some power problems. You have to do a soft reset to get it going once the power supply is on. Since I didn't have a case, I just touched a screw driver to the reset pins on the board in the corner opposite the CPUs (check the manual). Finally I was able to get the thing up consistently, and get into the bios. But I was dismayed to find that only one CPU was recognized. At this point I didn't know if whether the CPUs were working. There were some problems reported with RAM on this board. I tried removing some of the RAM. I made some posts. Someone told me I need the auxiliary power connector. There is a 24 pin connector from the power supply of which 20 pins are used by the board. There is also a 4 pin power connector. And there is a third 6-pin connector, but my power supply doesn't have the necessary cable. So I bought the converter cable but it didn't make any difference. To this day, I still have no idea what it's for. Eventually I started moving CPUs around and experimenting. What I found was that if I only put one CPU in slot 0, one of them would come up as an XP and the other came up as an MP. If I put both CPUs in, the CPU in slot 1 was never recognized. I decided I would have to remod. You can do this with just about any conductive grease, but I bought a little kit just be on the safe side (below). I applied the mod to the XP chip, and that solved my problem.
One advantage of having this board was that it had four RAM slots instead of the usual two. This allowed me to get really cheap used RAM on Ebay because most people can't use four sticks. I got a gig for under 30 dollars. A disadvantage is that the motherboard is really large. That in combination with having a raid array means I'm going to need a large special case (which I still don't have). Also, I needed at least a 400 Watt power supply. I got an antec True Power II 480 Watt supply. I learned the hard way that it won't come on unless plugged into a motherboard. On a positive note, it's quiet and it will shut itself off if you short something. (I learned this too the hard way.)
The next tricky part was the raid array. I found 9 Seagate cheetah 9.1 gig SCSI* hard disks (ST39102LC) on Ebay for 30 dollars after shipping. They were being sold "as is", but I took a risk. I also got a cheap raid card (AAA130u2) and a six disk backplane. I bought the backplane because the drives I got end in 'LC'. This means they have SCA2 connections, which are generally intended for backplanes. (I believe the only difference between SCA2 and SCA1 is the height of the pins). I had to do a lot of research on SCSI because I had no ideas how these parts were supposed to work together. It turns out you have to have what's called termination when working with SCSI. Fortunately, the backplane I got is automatically terminated and the raid array is also terminated. The drives don't allow you to use inline termination; so, this was good. I also needed a cable. I bought an internal one which was intended to work with LVD (Low Voltage Differential) Wide Ultra2 SCSI drives. It also had to have 68 pin VHDI (Very High Density) SCA2 connections. It came with three male terminals. One is intended for an external terminator, which I didn't need. These cables can get very expensive if they have lots of terminals.
My first scare was finding out the raid controller was not supported in Linux. However, a little searching around revealed that the generic aic7xxx module works just fine. The next problem I had was with the backplane. It had a 2x4 power connector. I had a hard time even finding a cable with a connector of this type. I finally found one that converted from the standard 1x4 pins and bought it. When it arrived, only 6 of the 8 pins were connected. It was at this point I realized that this backplane was specially made for a special Intel server (the Cabrillo-C). Well I forged ahead anyway.
Once I learned that the yellow wires are 12 volts, the red ones are 5 volts, and the black ones are ground, I had this silly idea that I knew exactly how to rewire the cable into the terminal. I removed the 4x1 plug and did some rewiring. The Molex pins I got were a little too large but I managed to force them back into the plug. The hard part was getting the wires clamped into the connectors. There is a correct way to do this and it requires an expensive crimper. I decided I would just make do with what I had or solder if I had to.
I set everything up and tried to see if I could get a hard disk going. The power supply wouldn't even come on. So obviously I had things wired wrong. I tried to find some documentation that explained the power pins, but I couldn't find anything. I emailed Intel. They were not helpful at all. Thanks Intel.
Second Email:
Hello Todd,

Thank you for contacting Intel(R) Technical Support.

Unfortunately, we do not seem to have that document. The only available information for this chassis is the one currently posted on the support website for this chassis, at the following link:

  http://support.intel.com/support/motherboards/server/chassis/cabrillo-c/

Regards,

Luis Pablo S.
Intel(R) Technical Support

Intel is a registered trademark of Intel Corporation or its subsidiaries in the United States and other countries.

*Other names and brands may be claimed as the property of others.

A representative of Intel may subsequently contact you (via email) in order to obtain your feedback on the quality of the support you received. If you do not wish to participate, simply delete the survey email.


<===== Received from goldfita@rose-hulman.edu on 2005-09-30-16.22.14.000000 ======>

Can I not just get the link to this document - 681374-002???

--
-Todd
812-251-6644


"Any sufficiently advanced incompetence is indistinguishable from malice." -post on slashdot
First Email:
-----Original Message-----
From: esg@mailbox.cps.intel.com [mailto:esg@mailbox.cps.intel.com]
Sent: Fri 9/30/2005 10:22 AM
To: Goldfinger, Todd A
Subject: RE: Intel(R) Server Control Email Support Request

Hello Todd,

Thank you for contacting Intel(R) Technical Support.

Unfortunately Intel is no longer manufacturing these products. Additionally, Intel no longer provides interactive support for these products via telephone or e-mail, nor will Intel provide any future software updates to support new operating systems or improve compatibility with third party devices and software products

You can find more information on this product at the following link:

  http://support.intel.com/support/motherboards/server/chassis/cabrillo-c/

Please do not hesitate to contact us again if you need further assistance.

Regards,

Luis Pablo S.
Intel(R) Technical Support

Intel is a registered trademark of Intel Corporation or its subsidiaries in the United States and other countries.

*Other names and brands may be claimed as the property of others.

A representative of Intel may subsequently contact you (via email) in order to obtain your feedback on the quality of the support you received. If you do not wish to participate, simply delete the survey email.

<===== Received from goldfita@rose-hulman.edu on 2005-09-29-19.01.34.000000 ======>

                                Hi, there is no way to ask a question about documentation on your site, so I've chosen the closest option.  I need document order # 681374-002.  (I'm looking for a pin-out diagram of J1 on the cabrillo backplane.)  I can't find it on the web site.  Can you please email it to me.  If intel helps me solve my problem, I'll be sure to include a link and put in a nice word when I write my article on this project.  Thank you.
##ERIGNORE##
First_name: Todd
Last_name: Goldfinger
Email: goldfita@rose-hulman.edu
Customer_type: End User
Product: Intel(R) Server Control
Product_id: 114
OS: Don't Know
Survey_opt_in: Yes
Bios_version:
BMC:
HSC:
FRUSDR:
board_selection: None
chassis_selection: Intel® Cabrillo-C Chassis
raid_selection: None
Processor_speed:
Processor_type:
sSpec:
Issue: Hi, there is no way to ask a question about documentation on your site, so I've chosen the closest option.  I need document order # 681374-002.  (I'm looking for a pin-out diagram of J1 on the cabrillo backplane.)  I can't find it on the web site.  Can you please email it to me.  If Intel helps me solve my problem, I'll be sure to include a link and put in a nice word when I write my article on this project.  Thank you.
Form_id: 48


{ See Attached File: Attachment }{ See Attached File: history.html }


IMPORTANT NOTE IF YOU REPLY TO THIS EMAIL: Please perform a reply with history so that the following identifier "[THREAD_ID:6266740]" is seen in your response email. This will insure that your reply is delivered to the proper support team at Intel and will reduce the time it takes to receive a response. Thank you.


{ See Attached File: Attachment }


IMPORTANT NOTE IF YOU REPLY TO THIS EMAIL: Please perform a reply with history so that the following identifier "[THREAD_ID:6267618]" is seen in your response email. This will insure that your reply is delivered to the proper support team at Intel and will reduce the time it takes to receive a response. Thank you.
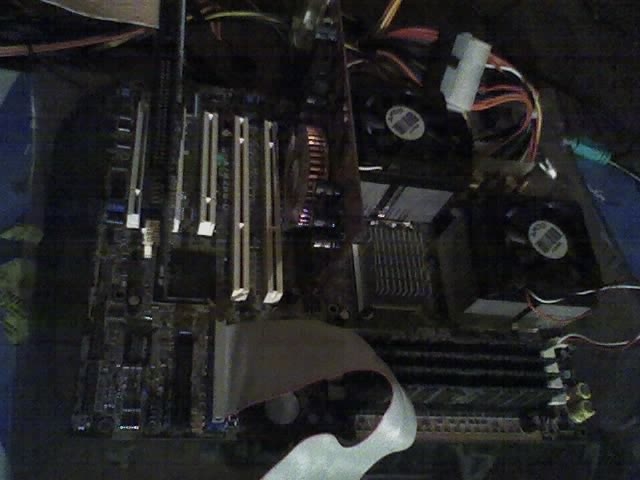
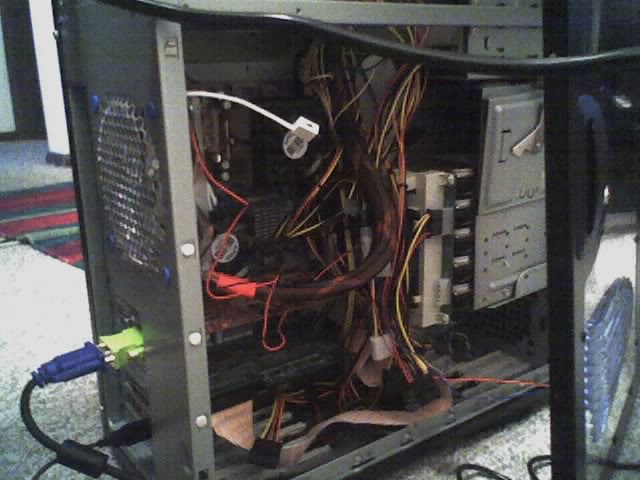
After some more searching, I got lucky and found some pictures of this thing in action. If you zoom in on the picture below, you should be able to tell how the thing is wired up. (It's the big green board.)
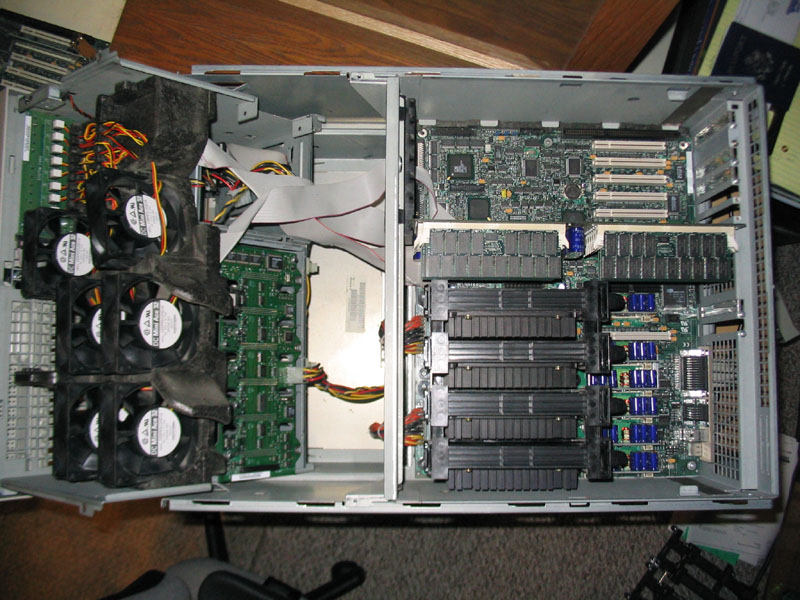
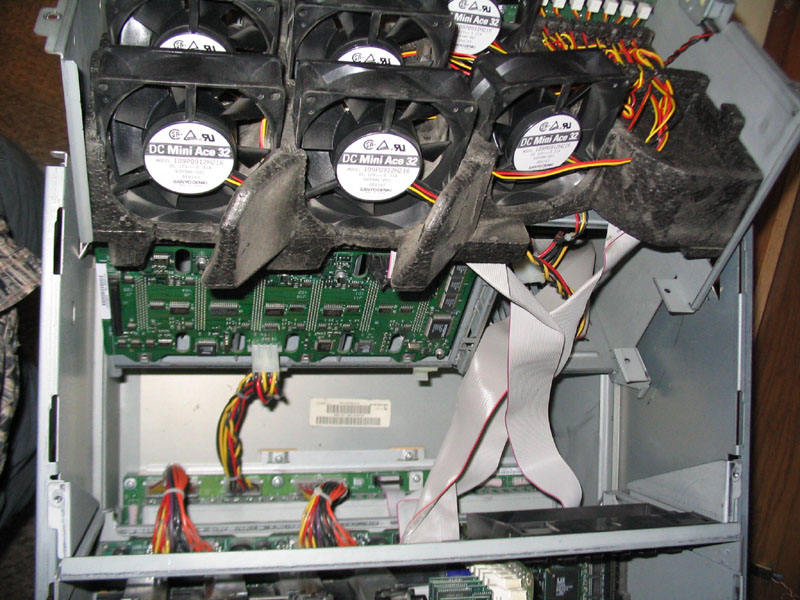
So I thought I was golden now. Unfortunately I had no way to get the little ATX pins out of the 2x4 Molex plug. I tried just about everything to get them out. Eventually I broke down and bought the special purpose tool. And it didn't work at all. I finally ended up clipping the wires and soldering them back on the way they are in the picture. I also got Molex to send me some free samples of the plugs and the pins, which I ended up never using. As you might have guessed, the hard disk(s) still didn't come on. Since I still had no idea if these drives were working (never buy hardware you can't test), I ended up getting a 68-pin to SCA2 converter. It also had a connection for an external terminator. I got an active LVD external terminator from the same guy. It had a nice LED that came on one side for an LVD termination, and the other side for single ended (SE) termination. I was finally able to verify that the drives, when powered correctly, would at least come on. Now, I know at least enough engineering to be dangerous. So I tried experimenting with different wirings. I started checking the pins of the converter and comparing the voltage levels to the pins on the backplane. Eventually I decided I had been defeated. Either the backplane wasn't working, or it needed some control logic from the front panel (which I didn't have).
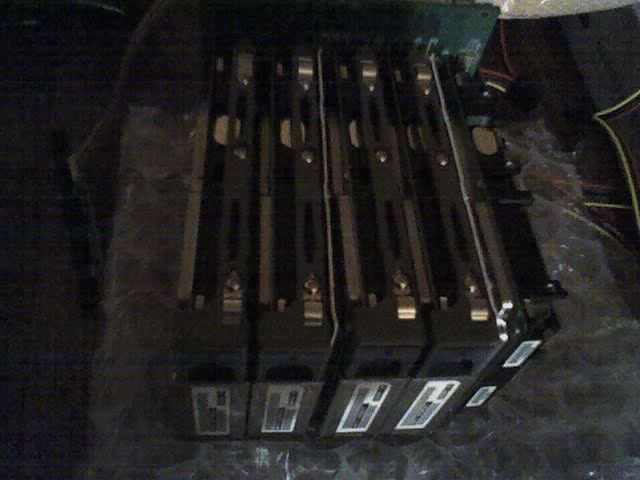
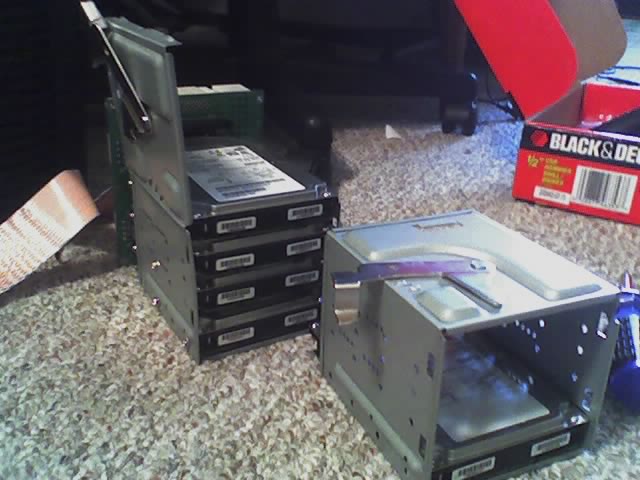
I must have blown about a hundred dollars and way too much time. But at least I learned some important things -- the most important being that you should always be sure you're not buying some kind of proprietary hardware. I ended up getting a general purpose 5 disk backplane. This one came with a fan and an dull grey cable already attached (and a spare). I removed the cable and replaced it with mine. There was also an external terminator on this board. Now I was on to the next problem. Once I finally got to testing all those drives, I found out one had some physical damage, six would spin up but didn't seem to work. The remaining two worked but had some bad sectors. I remapped the bad sectors on one drive. The other had too many (and there was no yes all option). Now of course I needed some more drives. This time I bought another four of the same ones for 60 dollars. It worked out to 15 dollars per drive in the end. It seems on Ebay you can't get below a certain price and still have working equipment.
The remaining hardware I got was a usb/firewire card (usb on the motherboard doesn't work), a cheap 17" LCD screen, a CD/DVD ROM with CD burner, a wireless mouse/keyboard combo, and a 4x AGP ATI 9600 Radeon graphics card. I really didn't need a good graphics card and had originally gotten a cheaper one on Ebay, but apparently it was lost by fedex. The one I got came with a DVI (Digital Visual Interface) converter. DVI lets you send a digital signal to the LCD. Usually the graphics card would convert the signal to analog for a CRT. But an LCD would just convert the signal back to digital; so, you can get higher quality by skipping the analog conversion. However, there is also an analog DVI connection. This is supposed to be better -- I don't know how. That seems to be the connector I got, and my LCD doesn't seem to accept a digital connection; so, that's what I'm using.
Software
It took forever to get to this point. I decided to go with Gentoo Linux because of portage. The installation was lengthy, and I ran into problems with raid. The first problem was that it didn't recognize the array. It turns out there is a special program you need to format the array. I tried it, but Gentoo still couldn't see the array. If it was working correctly, the OS should see just one logical drive, but it saw five. Eventually I gave up and decided to go with software raid. While I was in the process of setting up raid, one of the drives hit a bad block (yes during the install -- can you believe it??). I had to restart and remap some blocks on that drive. Afterwords I found out I could no longer mount the raid drive because it was software raid and it required the (somewhat long) raidtab file. I ended up starting from scratch. It was later I found out that you can use mdadm (see resources) to mount software raid pretty easily.
Otherwise, the basic installation went relatively smoothly. I couldn't log in the first few times because I didn't compile everything I needed into the kernel. I also goofed up my grub file a bit. Make sure you get all the raid support you need compiled in. If you can't boot into the kernel, use the live cd and mdadm to remount your drive. Another problem was that apparently the live cd only has support for four devices. If you have more you need to 'mount --bind /dev /mnt/gentoo/dev' before chroot. Otherwise you won't be able to access drives greater than four, and you may have trouble shutting down.
Update
After the last paragraph, I thought I was basically done. But I ran into many more problems. The first problem I had was getting my wireless usb stick to work. I spent several days installing drivers trying to find the correct one. Unfortunately, there is almost no way to know what the actual chip is inside your device. Two different devices with the same model number can have different chips inside. With some help, I eventually found out that I had a prism2 device (not rt2750 as I thought) by looking at the drivers windows was using. There are no open source drivers for this. You have to use ndiswrapper. You will also need to patch your kernel so that it has 16k stacks. You can find more from my forum postings.
The next problem was I had a usb wireless buletooth device that I was never able to get working. I installed openobex and obexftp. The first problem is that the pin helper script does not work. You need to replace it with a script that simply echoes "Pin: xxxx" where xxxx is your pin number. You have to set the script in /etc/bluetooth/hcid.conf. I was never able to get obexftp (even after upgrading to 1.1) to read files off my phone. Later, after installing KDE, I found out there is a much easier way to use open obex. KDE has it's own high level bluetooth software. Once you have the sdpd and kbluetoothd daemons running, you can use the Konqueror browser as an interface to the phone. But I still couldn't get it to work. One time, for some strange reason, I was able to download a single photo.
The next problem I had that was my machine was locking up on me. It crashed often during emerge and occasionally at other times. It was very unstable in X windows. Often when it came back up, it had crashed so bad, I could hear the raid drive rebuilding itself. At least once or twice I had to do it manually from the livecd. By compiling in some debug support into my kernel. I finally found out that the aic7xxx driver had a bug. I upgraded to a release candidate kernel which had the fix. This solved the worst of the crashes, but it was still unstable.
I installed a kernel debugging utility to help me out. In the process of trying to get it to work, I found out that the problem was with ndiswrapper or the driver it was using. I put in a standard PCI ethernet card. The first time I installed the card, my machine nearly crashed, citing "bus error". I latter reset the machine and it wouldn't restart. (It was asking me to press <del> at the bios which was really bad because my ps2 ports stopped working a few weeks back.) I finally ended up swapping the usb card and the ethernet card. This fixed all my problems. I have working ethernet, and the machine is not crashing. Wireless, unfortunately, seems to be a lost cause.
I ran into other problems as well.
- You need to add users to the wheel group for them to be able to 'su'. They need to be in games to play games.
- I bought an external firewire (Fantom Titanium) drive which apparently does not work. I couldn't get it to work in windows either. However, I read there are some hardware conflicts with firewire and via usb/firewire cards.
- The wireless keyboard occasionally has problems.
- As I mentiond, the ps2 ports don't work. That means I can't get into my bios or do anything at the grub prompy because there is no support for usb on this motherboard. I tried getting a ps2 to serial adaptor but it didn't help.
- Because I'm using an rc kernel, I can't get the necessary device drivers for my graphics card. (You need to recompile and install ndiswrapper and fglrx drivers every time you change the kernel.) X windows seems to work. I guess I'll just be without graphics acceleration. (Hm, looks like I can't play tuxracer anymore.)
Here are some more photos of the machine. It took me a while to find a case. For some reason, this raid drive has unusual spacing between drives. And to make it worse, standard cases are made for four drives. But I have five. I had to basically tear apart one of the two drive cases to get my array to fit. Otherwise, this is a really nice case. You can also take a look at some of my backup files. The latest versions are on the open source page.
*SCSI:
There is a lot of information on the web about
SCSI. Fortunately for me, all my devices were the same. That makes
it a lot easier. You need to be aware that there are multiple SCSI
protocols. They're all backwards compatible. But some devices may
not work well or at all on the bus with others (for example, there's
HVD, LVD, and SE signaling). The cables and terminators you get will
depend on the protocol and signaling type. If you mix devices, you
will have to worry about things like hi and low byte termination.
You should also be aware of the different connections. Some of the older ones are 50 pins. Newer ones are 68 pins. The SCA connections, which are meant for backplanes, are 80 pins. That's because they also have power pins. Usually you would power each drive separately.
There are many different kinds of terminators. The external ones need their own connection on the bus. Internal ones go between the device and the bus connection. There are active and passive terminators. With LVD you'll need active termination. The drives I got only allow for external termination. Usually the raid card and backplane will be terminated for you.
There are also internal and external cables. My raid adaptor has connections for both internal and external cables. That's so you can put the array in an external enclosure if you wish.
Resources:
Hard Disks
SC450NX
AMD Motherboard
Cabrillo-C
RAID Array
USB WIFI
CD Record
CD Record
USB Bluetooth
USB
Software RAID
My Raid Post
ATI Radeon
http://www.crazypc.com
http://www.mycableshop.com
http://www.a2zcables.com
http://www.mypccase.com
http://www.endpcnoise.com
http://www.mouser.com
http://www.frozenpc.com
http://www.Ebay.com (http://www.Paypal.com)